
Coloring Line Art
Blurring the line from inking to coloring


In my last several newsletters, I’ve explored traditional line art and inking—using blacks, feathering, and the terminator. This is where those fundamentals come together and collide with modern digital coloring.
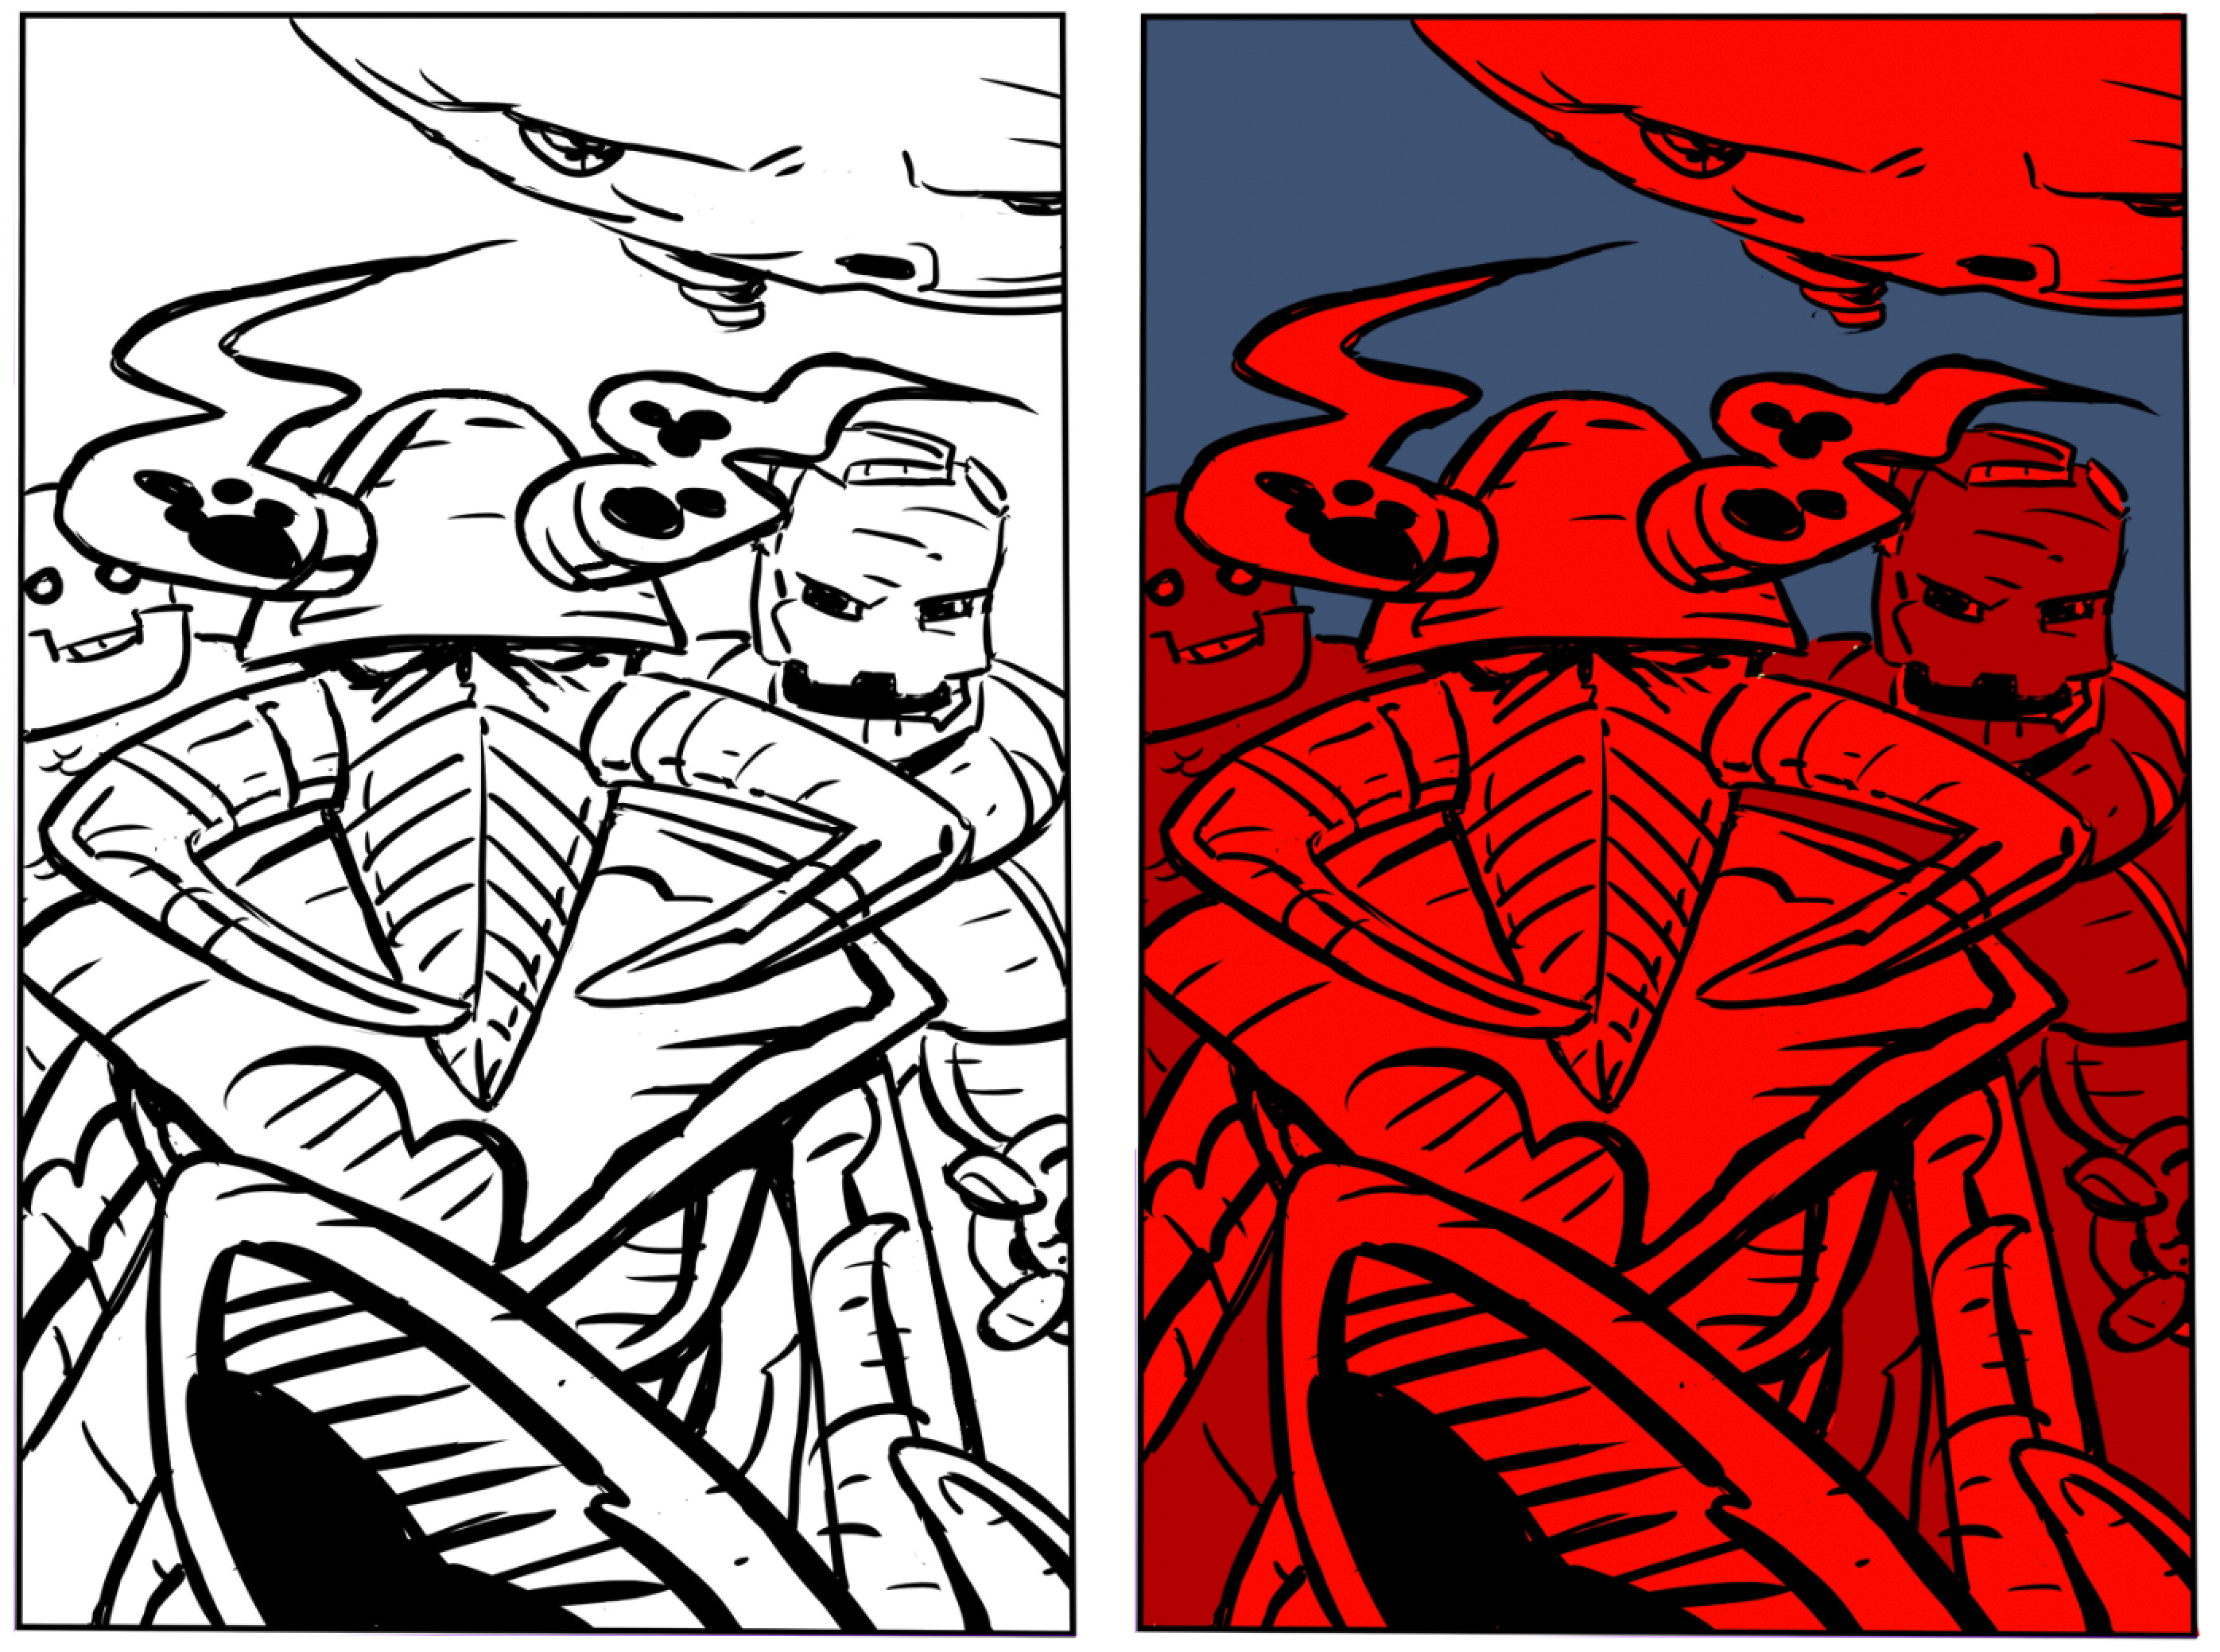
On the left is the finished line art. On the right, I’ve added color flats on a separate layer.
Color flats come first because they clearly separate each element, making it easier to control lighting, shadows, and color choices as the piece develops. Working this way keeps the drawing intact as I will need to separate the line art later.

On the left, I’ve added highlights; on the right, shadows—each on its own layer. Working this way gives me the flexibility to adjust hue and brightness, or add and subtract as needed, without affecting the core line art or color layers.
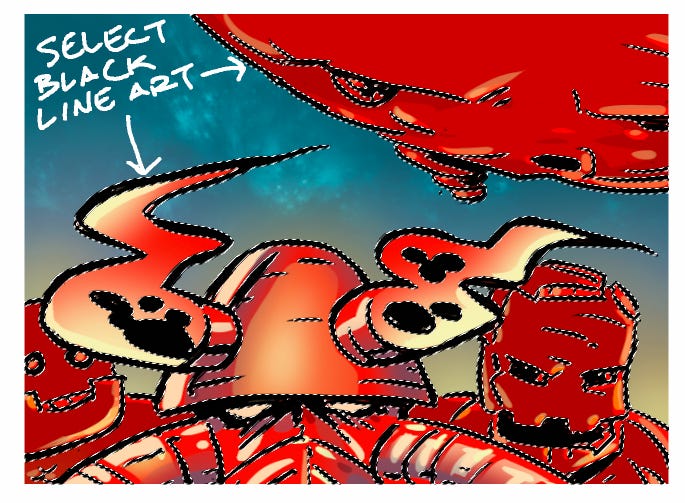
Next, I separate the line art from the rest of the image. This can be done by selecting the black areas directly or by creating a layer mask. Either approach isolates the blacks, allowing me to color the line art independently without affecting the underlying colors or shading.
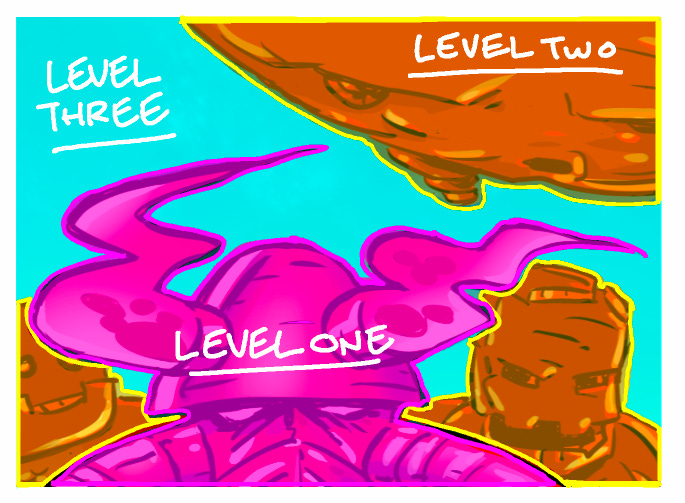
By coloring the line art, I enhance the three distinct visual levels in the drawing, strengthening the illusion of depth in my comic panel.
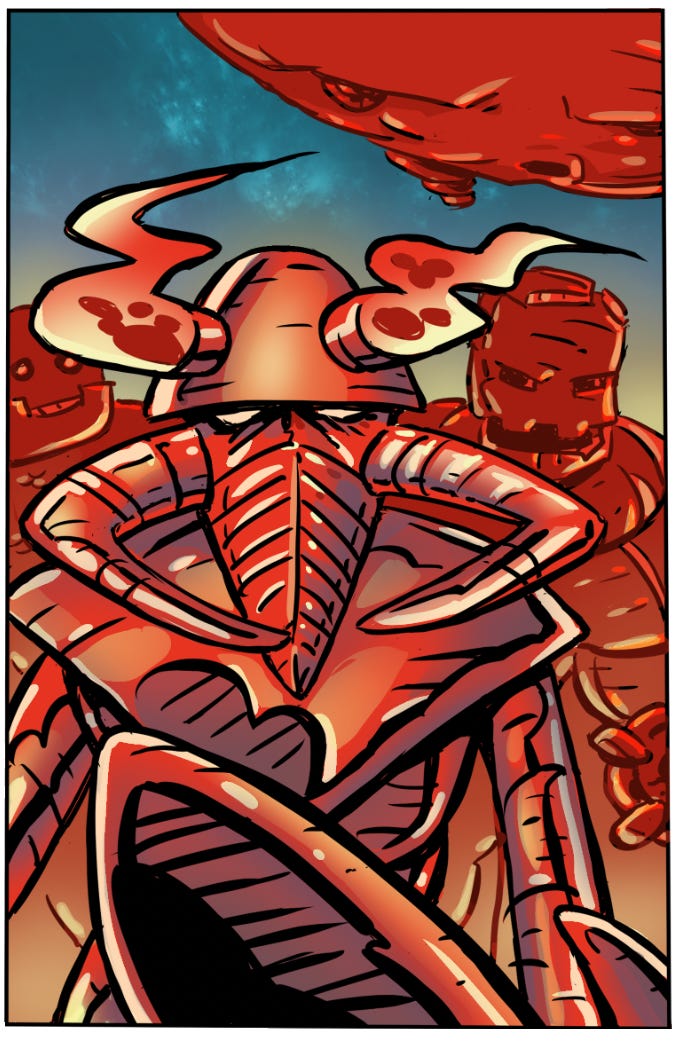
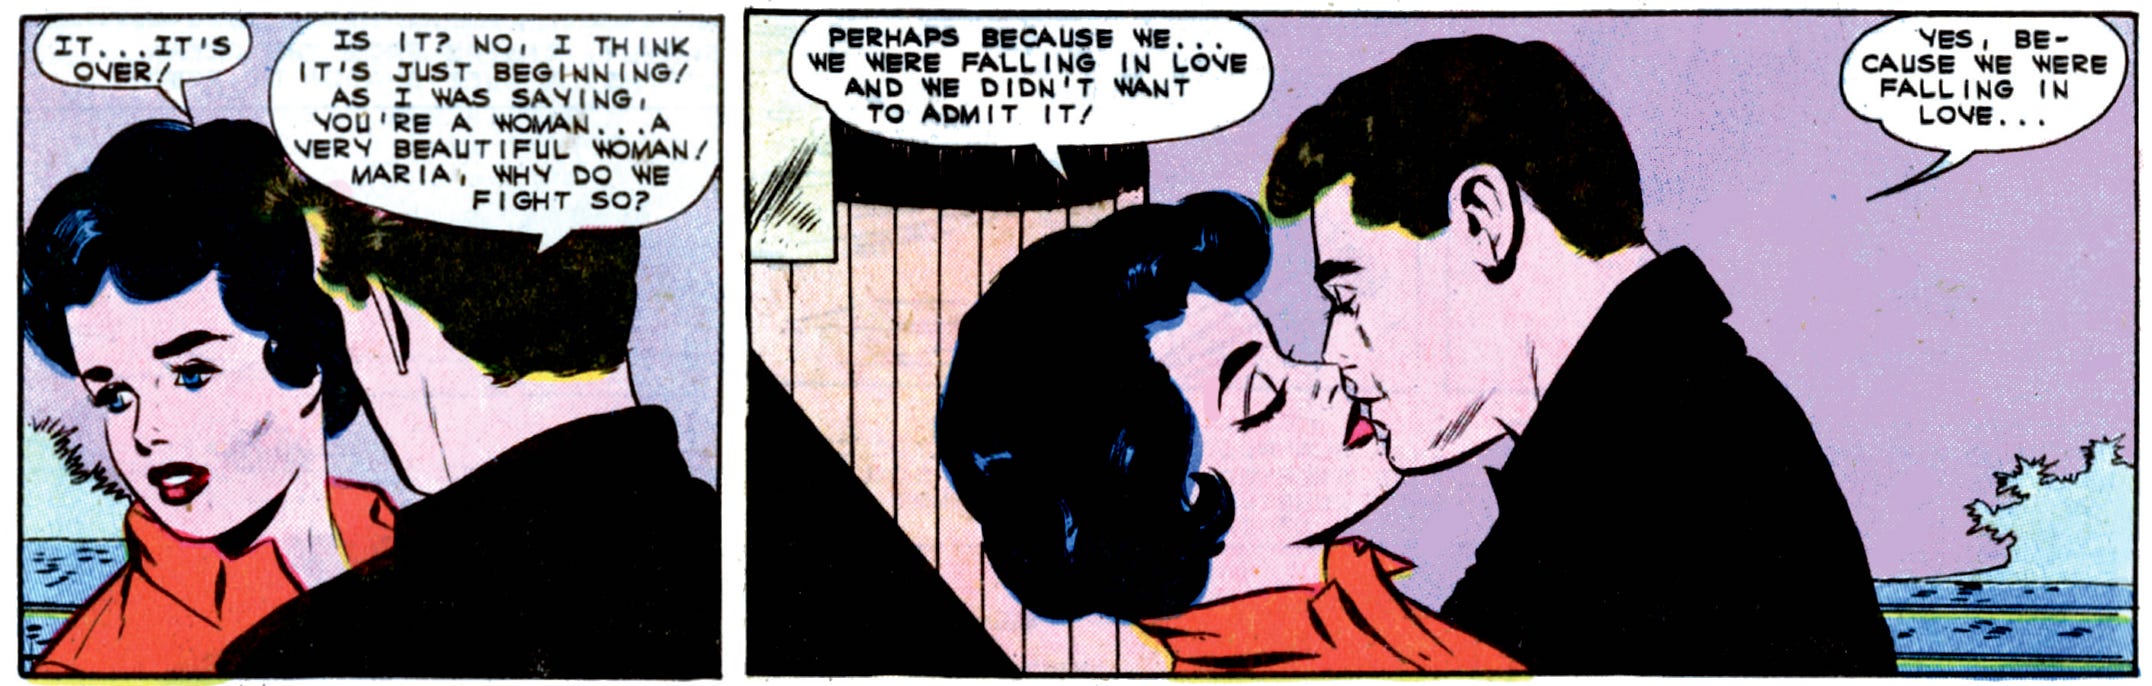
In the finished panel, the foreground figure is inked in black, while the background figures use red line work. This separation establishes clear spatial layers—foreground, midground, and background. While the effect may appear subtle, it has a significant impact on how the eye reads the image.
This approach also reflects how contemporary comics have evolved, blurring the traditional boundary between line art and painting.
Keep Creating,


Awesome post!
Nice post. Good note re: coloring line art of background figures.etc.